
If you’ve ever had to resize hundreds of images, you know just how complex and time-consuming it is. As your images are scattered across multiple folders and drives, manually resizing every single image one by one is something nobody has time for. So how do you batch resize multiple images at once? Thankfully, there are a couple of ways you can automate the entire procedure and get things done pretty easily and quickly. Read on to find out how.
Method 1: Change Images Size Using Mail Recipient
One of the hidden features of Windows is its ability to batch edit your images without needing to download special software. Try to import your images into Mail Recipient (don’t worry, we aren’t emailing them to anybody), and then change the image size the way you like.
1. Move all the images you want to resize into a single folder (for example, NewFolder1).
2. Select all the images in NewFolder1 using Ctrl + A keyboard shortcut.
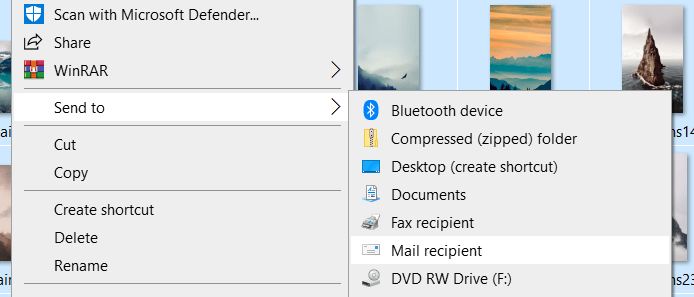
3. Now, right-click one of the selected images and select Send to > Mail Recipient.
4. Windows will display a new dialog prompting you to select your desired image size. Choose one of the following sizes:
- Smaller: 640*480
- Small: 800*600
- Medium: 1024*768
- Large: 1280*1024
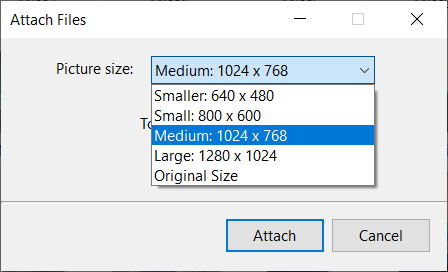
5. After selecting your desired image, click on Attach.
6. Press Windows Key + R.
7. Type %temp%
8. Click OK.
9. You can find your resized images in the Temporary folder, and move them back to your desired folder.
Method 2: Using Microsoft PowerToys
Back in the days of Windows 95 and Windows XP, the techno-giant shipped Microsoft PowerToys that made user’s computing life a bit easier. You can use the image resizer feature in Microsoft PowerToys to automate the batch renaming of your files.
Don’t worry, we aren’t going to ask you to downgrade to Windows 95 or XP! Microsoft has resurrected this utility as an open-source project for Windows 10 users, who can install it freely.
1. You can grab resurrected Microsoft PowerToys for Windows 10 from its official website.
2. After installing Microsoft PowerToys, select the images you want to resize, and right-click your selection.
3. Choose the option ‘Resize pictures’ from the context menu.
4. Choose one of the following image sizes:
- Small (854*480 pixels)
- Medium (1366*768 pixels)
- Large (1920*1080 pixels)
- Phone (320*568 pixels)
- Raymondcc (2560*auto pixels)
5. If you couldn’t find your desired image size, use the Custom option and specify the height and width in Pixels.
6. By default, Microsoft PowerToys will not edit the original images. Instead, it’ll make a copy of your images and resize them to prevent unwarranted changes. If you need, you can disable this feature by checking the ‘Resize the original picture (don’t create copies)’ option.
7. Click on Resize to proceed.
Method 3: Resize Multiple Images at Once Using Third-Party Freeware Tools
Another option is to use IrfanView. IrfanView is a freeware image viewer and manipulator with batch renaming functionality and many other add-on features. Using IrfanView, you can specify a custom height and width for your images and rename them with a single click.
Warning: The IrfanView’s user interface is cluttered with so many program features and complex options.
1. Click on the File menu, and select the ‘Batch Conversion/ Rename’ option.
2. You’ll have a new dialog Batch Conversion on your screen.
3. Browse and add your images, or use the ‘Add All’ button to add all the images.
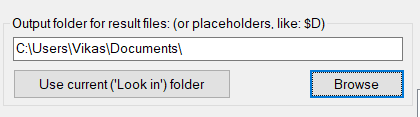
4. In the ‘Output directory for result files, specify the target path where you want to store your resized images.
5. Check the box ‘Use advanced filters (for bulk resize)’ and then click on Advanced.
6. You’ll have another new dialog with plenty of options.
7. Check the ‘Resize’ checkbox and select ‘Set one or both sides to’.
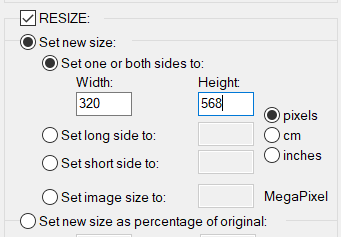
8. Now, set your desired height and width and then click OK.
9. Click on ‘Start Batch’ to proceed.
Leave a Reply
You must be logged in to post a comment.