
There comes a time when you need to format your hard disk or SSD and reinstall the operating system. Or maybe you want to get rid of the virus infection, fix a temporary glitch with the disk or sell your disk to someone else. Nevertheless, there are multiple ways to format your disk in Windows 11.
Difference Between Full Format & Quick Format
Formatting is the process of erasing a disk for its first use or subsequent reuse. There are two kinds of disk formatting:
Full Format
Full Format is considered as a normal format. It is formatting in its true sense. Full Format overwrites any data stored on the disk, destroys references to your files, and performs disk checks to detect bad sectors, if any. This is precisely why it takes a considerable amount of time compared to the Quick Format.
Quick Format
In contrast, Quick Format does not erase or overwrite the data stored on your disk. It only erases the list of files stored on the disk and doesn’t touch your data. In other words, it only destroys references to files stored on your disk instead of erasing the files. This is why your files can sometimes be fully or partially recoverable with the Quick Format. Full Format does not perform any additional disk checks to determine whether your hard disk has bad sectors or not. It does not check the health of your disk.
Which Format Should You Prefer?
It largely depends on what you’re trying to accomplish.
If you’re looking to sell your computer or your disk to someone else, you might want to make it difficult (or preferably impossible) for them to recover your deleted data. If that’s something you’re looking for, choose the Full Format.
A Full Format is also recommended if your hard disk is damaged. As explained earlier, a Full Format scans your disk for bad sectors alongside other procedures. Storing data on bad sectors can cause read/ write errors, make your files unreadable and unexpected data losses. Use Full Format if there are issues with your disk.
If you’re looking to merely reinstall Windows to fix performance issues, system glitches or corrupted operating system files, a Full Format is something you may want to avoid. Prefer Quick Format, as the Full Format can take a considerable amount of time and you may actually not need it, in most cases.
Different Ways to Format a Hard Disk or SSD in Windows 11
Method 1: Using File Explorer
The most common way to format non-system partitions is to use File Explorer (earlier, Windows Explorer).
- Open File Explorer.
- Select the “This PC” icon on the left-hand side panel.
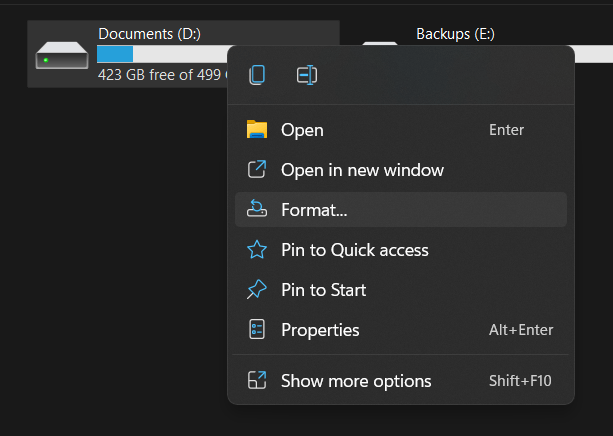
- Right-click the drive you want to format.
- Select “Format”.
- In the new dialog, check “Quick format” for quick format.
- Click on “Start”.
Method 2: Using Disk Management
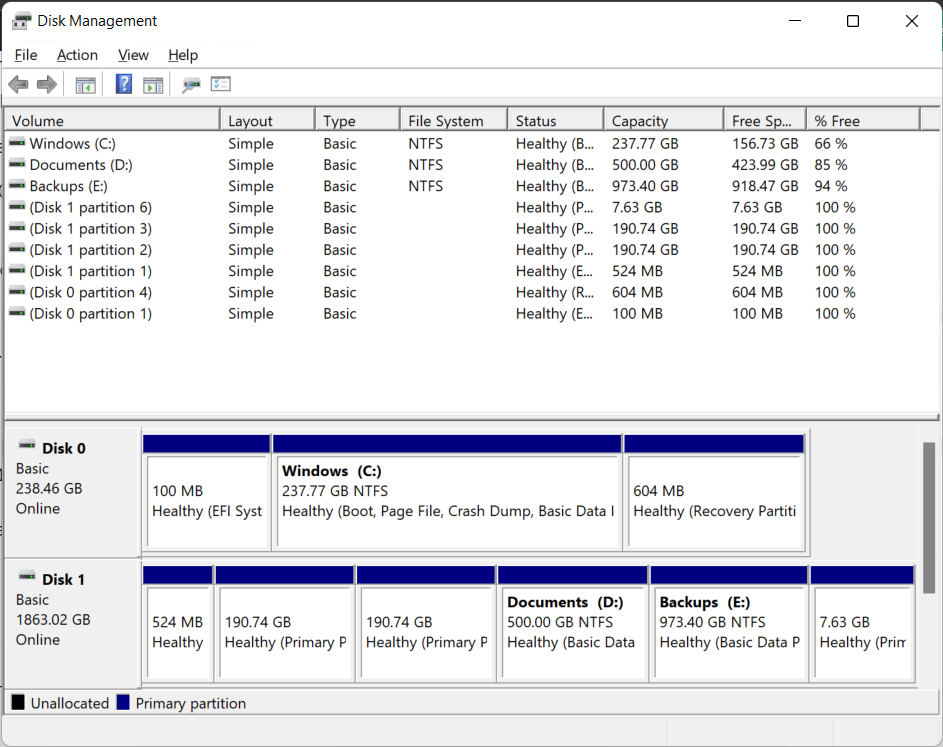
Disk Management is a tool in Windows that lets you perform administrative tasks related to storage devices, for example, creation of new drives, shrinking existing drives, formatting drives, changing drive letters, etc.
- Open the Disk Management tool. There are multiple ways to open it.
- Press Windows Key + X, select Disk Management
- Right-click on the Start button, select Disk Management.
- Click on the Start button, type “Create and format hard disk partitions” and open it from the search results.
- Right-click on a drive you want to format.
- Select the Format option.
- In the new dialog, check the Perform a quick format option for quick format.
- Click on OK.
Method 3: Using the Settings
The Windows Settings also provides an option to format your drives. Here’s how to format a hard disk or SSD in Windows 11:
1. Click on the Start button.
2. Click on the Settings icon.
3. Click on the System tab on the left-hand side panel.

4. Click on Storage.
5. Click on Advanced Storage Settings.
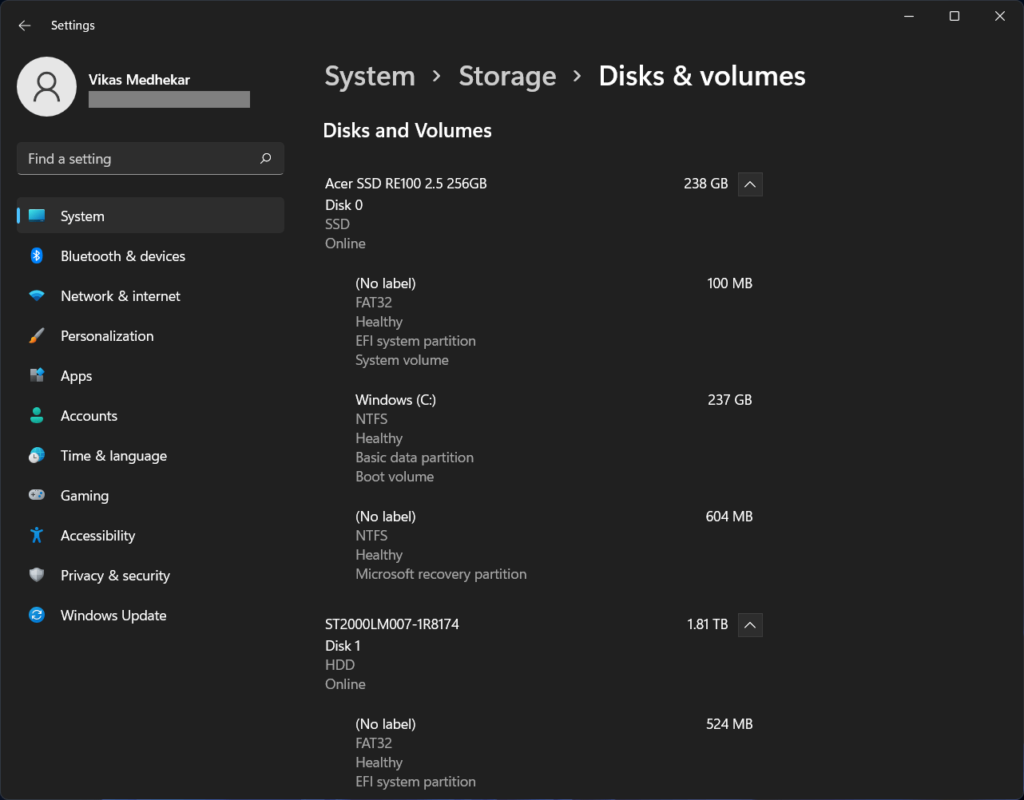
6. Select Disks & Volumes.
7. In the new page, you’ll see a list of all storage drives and their partitions. For example: If your computer has both SSD and HDD connected, they will appear alongside their partitions (C:, D:, E:, etc.).
8. Select a partition you want to format.
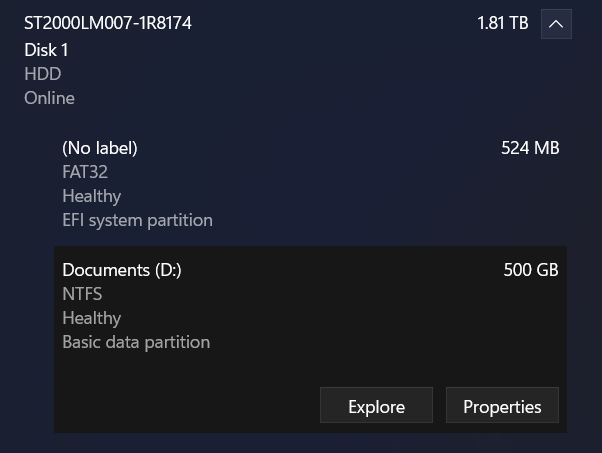
9. Click on Properties.
10. In the new page, click on Format.

11. Follow the on-screen instructions.
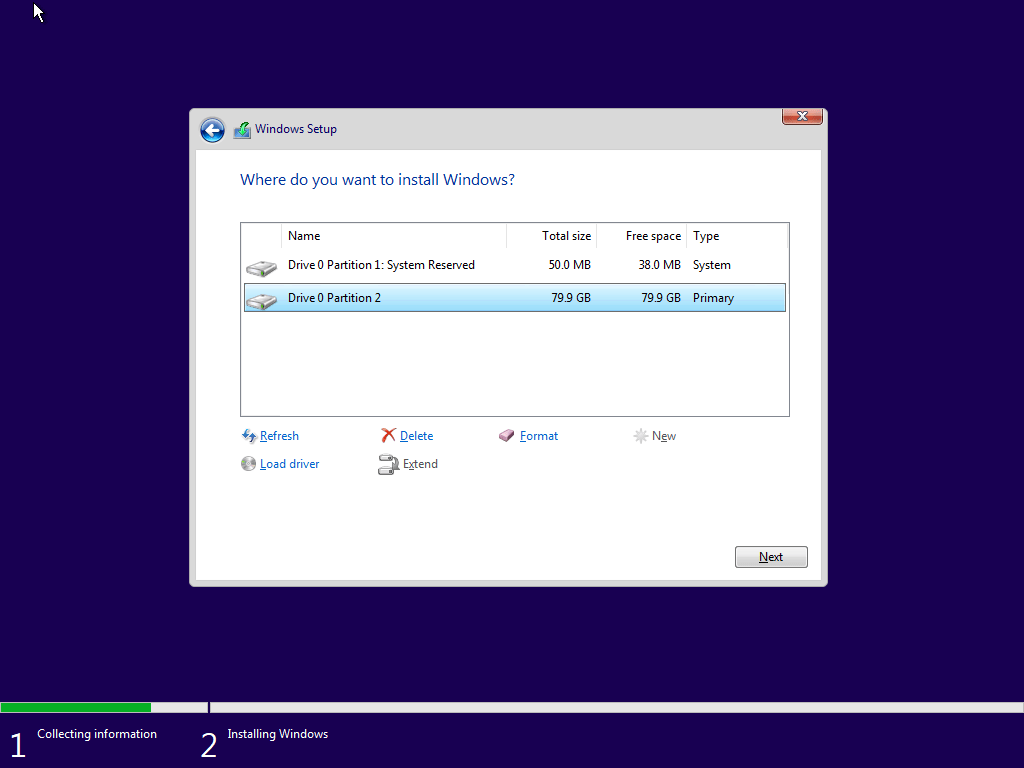
Method 4: Using Windows Installation Media
One of the most common ways to format drives is to boot through your Windows installation media and follow the on-screen instructions.
In the “Where do you want to install Windows?” page, you’ll see a list of all drives. Choose a drive you want to format and then click on the Format icon underneath the list. You’ll be asked to confirm the action.
Method 5: Using Command Prompt (Not Recommended)
Warning: Typing incorrect commands or providing wrong inputs can cause accidental data loss, unexpected results or make the concerning drive inaccessible. If you’re an average computer user, you’re strongly advised to avoid this method.
- Click on the Search box on your Taskbar.
- Type “cmd”
- Move your cursor onto the “Command Prompt” and select the “Run as administrator” option from the right-side menu options.
- Type “diskpart”
- Type “list disk”
- Windows will list the drives on your computer. Each drive will have a disk number associated with it.
- Now, specify which drive you want to select for formatting. Type “select disk <number>”. For example: To select the disk 3 for formatting, type “select disk 3”
- Type “clean”
- Type “create partition primary”
- Type “format fs=NTFS” to format your drive with the NTFS file system. To format your drive with the FAT32 file system, type “format fs=FAT32” instead.
- Wait until your drive is successfully formatted. Once the procedure is completed, type “assign” to assign a drive letter.
- Type “exit” to quit.
Note: If you’re unable to boot Windows to access Command Prompt, there’s another way. Boot through your Windows installation media and then select the “Repair your computer” option and follow the on-screen instructions.
Leave a Reply
You must be logged in to post a comment.