
This blog explores how to change download location in Windows 11, 10, and 8.1/ 8. To change the Downloads folder location, right-click on that folder and select Properties. In the Properties, go to Location > Move, and specify a new folder. Click on OK to save the changes.
Whether it’s software, games, movies, YouTube videos, TV shows, or e-books, nowadays, so much content is available at our fingertips. With the cost of the Internet decreasing, there is a significant spike in the number of downloads. But what if you don’t want to use the default Downloads folder? What if you want to change download folder to another drive? Thankfully, it’s easier. Keep reading to know how.
Default Downloads Folder Location
The Downloads folder is accessible from the User Files shortcut on your desktop or the File Explorer (depending on your Windows version). The default location of the Downloads folder is C:\Users\<UserName>\Downloads.
How to Change Download Location in Different Windows Versions?
Change Download Location in Windows 11
Here’s how you can change download location in Windows 11:
1. Double-click on the This PC icon.
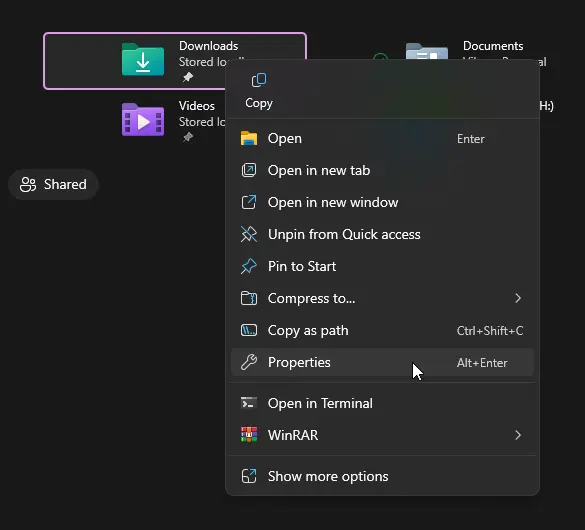
2. Right-click on your Downloads folder.
3. Choose the Properties option.
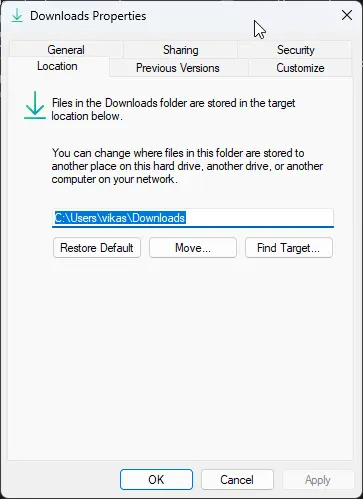
4. In the subsequent dialog, click on the Location tab.
5. Click on Move.
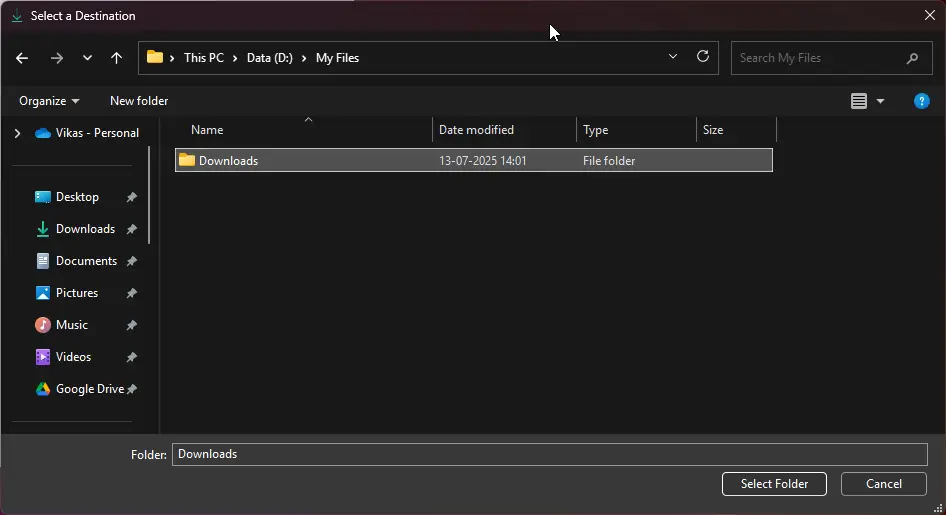
5. If you want to change download folder to D drive, select your D drive. Similarly, you can also select just another folder on your existing drive.
6. Click on Apply.
7. A new prompt will appear. Click on Yes.
8. Click on OK.
Change Download Path Windows 10
Here’s how to change download path Windows 10 operating system:
1. Double-click on the This PC icon.
2. Right-click on your Downloads folder, select Properties.
3. Click on the Location tab in the new dialog.
4. Click on the Move button.
5. Select a new drive to change download folder to another drive (for example, you can change download folder to D drive). Alternatively, you can select just another folder in the same drive. It’s up to you.
6. Click on Apply.
7. A new prompt will appear. Click on Yes.
8. Click on OK.
Change Default Download Location Windows 7 & Windows 8/ 8.1
If you’re using an earlier version, such as Win7, here’s how you can change default download location windows 7:
1. Click on the File Explorer icon on your Taskbar. Or, fire up the File Explorer using the Windows + E shortcut.
2. It will open the Libraries page. Look for the Downloads folder on the sidebar on the left.
3. Right-click on the Downloads folder, and select Properties.
4. Click on Location, followed by Move.
5. Choose a new folder or drive to change location of downloads folder.
6. Click on Apply > Yes > OK.
Bonus Tip: Delete Duplicate Downloads & Free-Up Your Storage
Many times, we download the same files multiple times without realizing it. Such duplicate downloads not only take up our storage, but also make it difficult to find the right file. Regularly deleting duplicate downloaded files from the Downloads folder will help you avoid such issues.
Steps
- Download DupInOut Duplicate Finder and install it on your computer.
- Click on the New Search tab.
- Click on Add, and select your Downloads folder.
- Click on Start Search.
- The scan will take a few moments, depending on the number and size of your files.
- After the scan is finished, you will be able to see which file types are taking up more storage and which ones are taking up less storage. You will also be able to get a list of folders with the total number of duplicates.
- Click on Review & Fix.
- Now, you need to specify which files to fix and which ones to keep. There are two ways to do so. First, mark the files you want to fix, and unmark the files you want to keep. The second method is to use the Select Duplicates and Selection Assistant button menu options. These options make it easy to mark/ unmark hundreds of files that match your criteria.
- Finally, click on the Select Assistant button.
- Choose one of the following options: Delete permanently, Move to Recycle Bin, Move to Folder, Rename, or Replace with Shortcut.
Benefits:
- Simple, fast and beginner-friendly interface
- Supports multiple duplicate scans: File Content + File Size, Music Search
- Music Search helps find duplicate music using music tags (album, artist, bit rate, etc.)
- Batch mark/ unmark duplicate files with dozens of automated selection patterns
- Displays a detailed history of actions taken
- Multiple options to fix duplicates
Limitations:
- It’s not free (it offers a 90-day fully-functional free trial)
Wrap Up
In this blog, we have discussed how to change download location in Windows 11 and earlier versions of Windows. The steps for all the versions are almost identical.
Frequently Asked Questions (FAQs)
Can I change download folder to another drive?
Yes, you can change download folder to another drive by simply specifying your new drive (such as D:\) as the target location.
Can I change location of Downloads folder to the original?
Yes, you can always revert the original Downloads folder location. To do so, open the Downloads Properties dialog again. Click on the Restore Default button in the Location tab. Finally, click on Apply > Yes > OK.
Leave a Reply
You must be logged in to post a comment.