We humans can remember websites by their recognizable alphabetical names (such as www.example.com) and less likely by their machine-readable IP Addresses (for example, 190.0.10.40). This is where the DNS comes into picture.
DNS is like a master phone book of the Internet. Much like your phonebook contains the names and phone numbers of your friends and family, the DNS is an extraordinarily huge database that contains the domain names and corresponding IP Addresses. When you type in the name of a website in your browser, your computer looks for the IP Address of the corresponding website before it could establish a connection to that website and start loading it’s content. Without the DNS, the Internet would not be what it is today. If the DNS didn’t exist, you would have to remember long, complex numerical IP Address of each favorite website you want to visit, or write it down somewhere else.
DNS Server or DNS Resolver
A DNS Server or DNS Resolver automatically translates a human-readable website name into the corresponding machine-readable IP Address. This process happens before your web browser starts loading a website’s content.
What is a Public DNS? Why Should I Use It?
Most often, the DNS Servers provided by your Internet Service Provider are poorly maintained. They’re not optimized for speed, performance and stability. As you open websites, the DNS Lookup process may perform slower than usual, and delay the loading of your websites.
Moreover, the DNS Servers provided by your ISP may face outages from time-to-time during peak hours. When that happens, your Internet gets disconnected for several hours and you’re left at the mercy of your ISP for a resolution. A quick way to check if that’s the case with you, is to use the Network Troubleshooter tool in Windows. Does the Network Troubleshooter show an error that reads “DNS Server is not responding”? If it does, you’re facing a DNS Server Outage.
You can quickly fix the problem and prevent future recurrence of the same by replacing your ISP’s DNS Server with that of a Public DNS.
A Public DNS replaces the DNS Server provided by your Internet Service Provider to improve speed, stability and security. There are many Public DNS Services available. Google Public DNS, 1.1.1.1 from Cloudflare and OpenDNS acquired by Cisco, are some of the leading ones and free. Yay!
Because the Public DNS Servers are specifically optimized for speed and security, they improve the performance of the DNS Lookup process and reduce the time required to load your websites. Even if your local ISP’s DNS Servers face outages, your Internet connection may remain unaffected and you will be able to browse the websites without interruptions. A Public DNS offers other additional security features that filter and block websites with malicious and adult content.
Now, let’s understand what the WARP is.
What is 1.1.1.1 with WARP?
1.1.1.1 is a Public DNS service from Cloudflare that replaces your current DNS Resolver — Internet Service Provider — with a DNS Resolver from Cloudflare. When you install 1.1.1.1 on your device (PC or smartphone), it provides an add-on feature called WARP. WARP is currently available with Cloudflare only. Other DNS providers do not provide it at this moment.
WARP is technically a Virtual Private Network (VPN) without the IP Address concealing feature. What that means is, much like a VPN, the WARP secures the DNS look-up process, as well as, the network traffic between your personal devices (such as computer, smartphone) and the services you use on the Internet. It prevents snooping by hackers and Man-in-the-Middle Attacks. You can privately browse the Internet as WARP automatically encrypts any unencrypted connections and secures the DNS lookup and network traffic through Cloudflare’s own secure servers. You can also disable WARP and continue using only Public DNS from Cloudflare, if you want.
Keep in mind, unlike a VPN, WARP does not mask your IP Address or slow-down your browsing, downloading and uploading speed. It’s not made up to hide or mask your IP Address. If that’s something you’re looking for, you’re better off using a trusted, high-quality VPN and following the best security practices to keep yourself safe on the Internet.
Which Public DNS Provider Should You Choose?
Well, it’s up to you. But here are some hints…
First things first, beware of malicious and non-reputed Public DNS providers as the cybercriminals can hijack your network traffic, read your private and confidential information (such as credit card and Internet banking details), and manipulate the DNS queries. They’re truly a nightmare. A malicious Public DNS service can be used to record everything that you do online, redirect you to malicious, phishing or adult websites. The phishing websites may look & behave exactly like the real ones, but they will be used to extract your confidential login credentials or credit card/ banking information. They may also induce malware into your device.
It’s highly recommended to go for a Public DNS provided by a well-established, reputed company like Google, IBM, Cloudflare, Cisco or any other. There are just too many good ones to choose from. Check-in a Public DNS that offers more servers nearby your region to get the maximum performance. It’s also important that a good Public DNS should offer the maximum uptime and additional privacy & security features. You may want to read the Privacy Policy of your DNS service provider to know what information they collect, how they process and secure your network traffic throughout the entire process, and what encryption algorithms they offer to secure your data in transit.
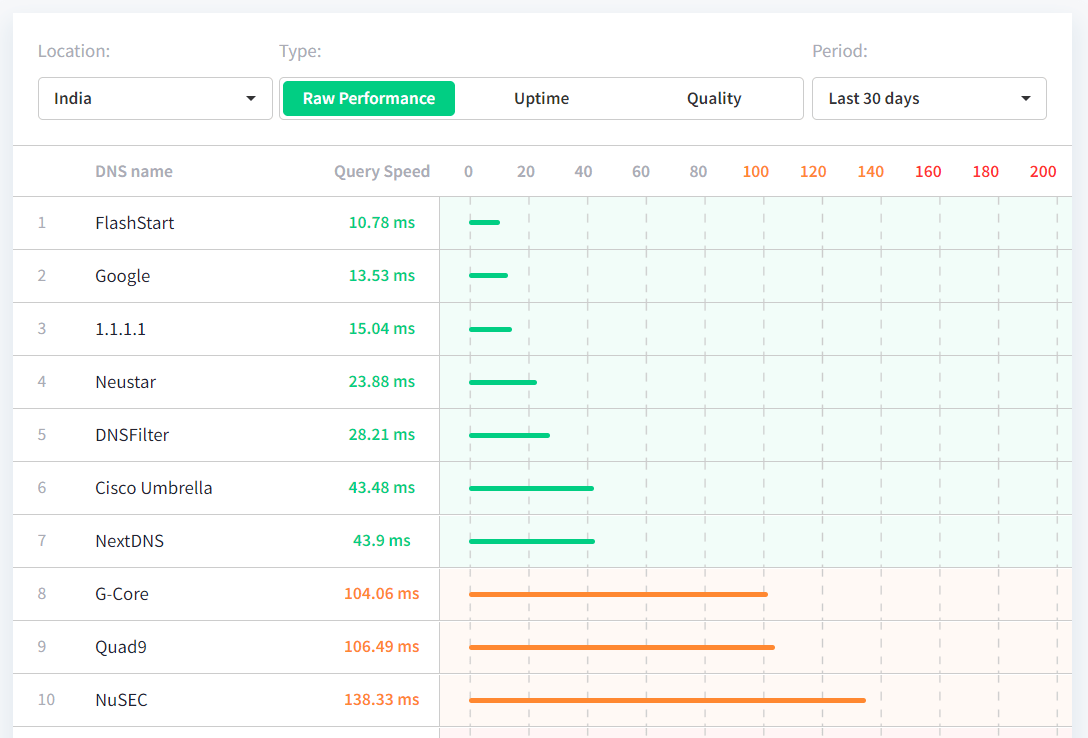
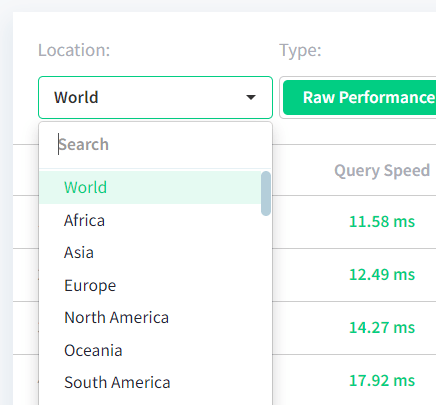
To make it ease, visit DNSPerf, enter your country/ region and compare the various Public DNS service providers by different parameters such as their speed, uptime and quality.
How to Set Up a Public DNS on Your PC?
Firstly, get your DNS IP Addresses from the links given below:
- Cisco Recursive DNS IP Addresses
- Cloudflare 1.1.1.1 IP Addresses
- Comodo Secure DNS IP Addresses
- Google Public DNS IP Addresses
- IBM Quad9 Public DNS IP Addresses
Most services offer separate pairs of DNS IP Addresses. For example: The first pair of DNS IP Addresses merely act as your Public DNS. Second pair of DNS IP Addresses additionally filter and block malicious websites for better security. Third pair blocks websites with the history of adult content. It’s best to opt in for a pair that blocks malicious websites to protect yourself and your family online alongside.
Method 1: Configure Your Router
The major benefit of using the router method is that it applies the configuration throughout all the devices connected to your home or office Wi-fi network. What that means is, you don’t have to separately configure the settings for each device connected to your home/ office Wi-fi. Moreover, your settings will not be lost after resetting, formatting or even changing your device.
Important:
- The steps provided below may vary depending on the brand and model of your router. These steps are provided for a general purpose only. For the exact steps, please visit the website of your router’s manufacturer, contact them, or refer to the accompanied manual/ documentations.
- These steps may require rebooting your router during the process. Your Internet connection may get disconnected for a while.
- If you wish to use the WARP security feature, refer to the Method 3 below.
For TP-Link WR841N Router:
1.Open up your router’s configuration page in your browser (for example, type in http://192.168.0.1/ for TP-Link routers. If you’re unsure, consult to your router’s manufacturer for the most accurate information)
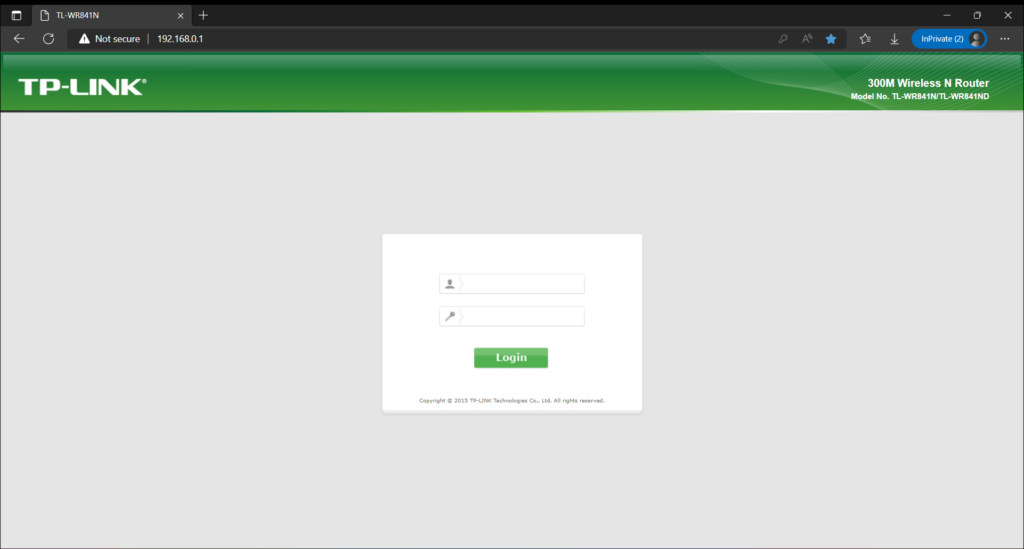
2. Sign-in with your credentials (for TP-Link routers, enter admin in both the user name and password textboxes.)
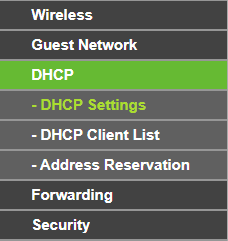
3. Click on the DHCP section > DHCP Settings.
4. In the Primary DNS and Secondary DNS, enter the values provided by your Public DNS Provider for the IPv4. These fields will change your DNS for Internet Protocol (IP) Version 4.

5. Verify that you’ve entered the correct values, and then click on Save.
6. You’ll be asked to reboot your router. Click on Reboot to confirm. Your Internet will be automatically disconnected during this process.
7. Your Internet connection will be re-established after a few seconds. If it doesn’t, wait a while and then connect to your Wi-fi again.
8. Now, let’s change the DNS for your Internet Protocol (IP) Version 6. To do so, click on IPv6 Support > IPv6 Setup.
9. Make sure Enable IPv6 box is checked-up.
10. Select the option named Use the following IPv6 DNS Servers.
11. Enter the Primary IPv6 DNS and Secondary IPv6 DNS provided by your DNS provider for IPv6.

12. Verify the values and then click on Save.
Method 2: Using the Settings (Windows 11)
It’s worth mentioning that any DNS changes you make using this method are only applied to the your current Wi-fi network. When you connect to a different Wi-fi, you’ll need to re-configure the same settings again for that network. When you format or reset your Windows PC, all the changes are lost.
1.Make sure that you’re connected to the network where you want to apply the new DNS settings.
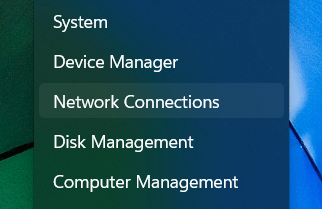
2. Right-click on your Start button, select Settings.
3. Select Network Connections.
4. Click on Wi-Fi.
5. Click on the active network connection in your home or office.
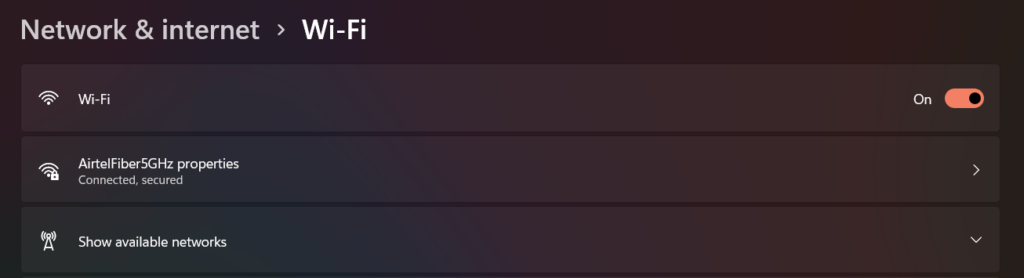
6. Scroll down the page and look for DNS Server Assignment.
7. Click on Edit next to the DNS Server Assignment.

8. A new dialog will pop-up. Select Manual from the drop-down box.
9. Set the IPv4 slider to the right (ON).
10. Enter the Primary DNS and Secondary DNS values for the IPv4 provided by your DNS provider in the Preferred DNS and Alternate DNS boxes respectively.
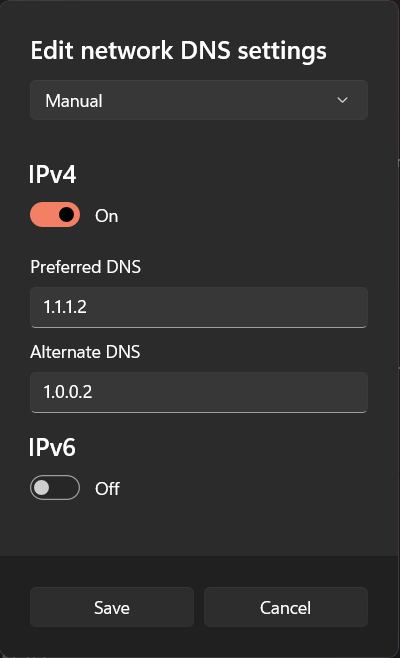
11. If your DNS provider supports encryption over HTTPS, it’s recommended that you turn on the encryption by selecting the option Encrypted only (DNS over HTTPS). If you’re unsure, contact your DNS provider or leave the default Unencrypted only selected.
12. Similarly, move the IPv6 slider to the right (ON).
13. Specify the appropriate values provided by your DNS provider for IPv6 in the respective fields.
14. Finally, click on Save.
Method 3: Activate 1.1.1.1 DNS with WARP (Cross-Platform)
If you wish to activate the WARP security feature in addition to the Public DNS, just download, install and fire-up the Cloudflare WARP application. It is pre-configured and no additional settings need to be changed. The application is available for Windows PC, Android PlayStore, MacOS, AppStore and Linux.
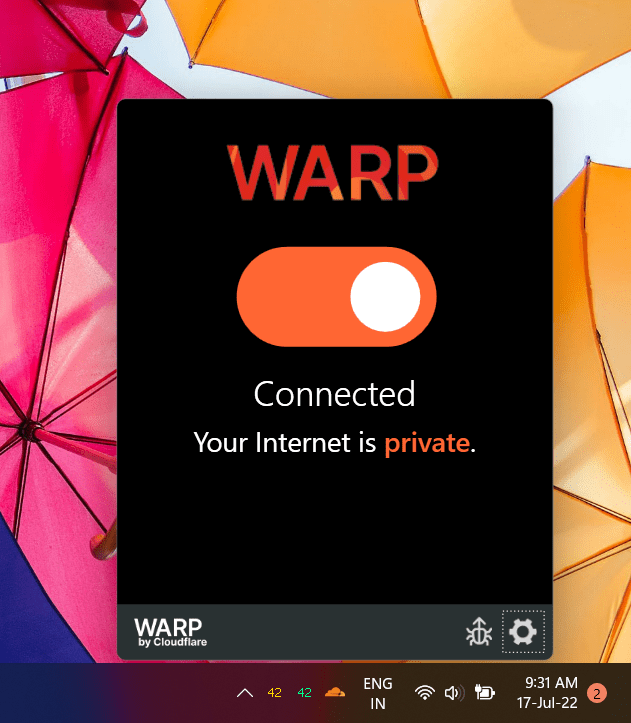
If you wish, you can disable the WARP feature anytime and use only Public DNS. To do so, just click on the Cloudflare WARP application’s icon in the system tray area of your Taskbar. Click on Settings and choose 1.1.1.1 instead of the default 1.1.1.1 with WARP.
Leave a Reply
You must be logged in to post a comment.