
MP3 tags (also known as mp3 metadata) are labels that provide vital information describing the audio content, such as album, artist, contributing artist, release year, genre, bit rate, ratings, and copyright, among other details. You can edit mp3 tags to organize your music files efficiently and display correct track information during playbacks. Let’s deep dive into the steps to change metadata on mp3 files with popular mp3 tag editor software.
Method 1: Batch Edit MP3 Tags with Free Mp3Tag Tool
MP3Tag is a free audio tag editor tool that lets you view and edit mp3 information in bulk. Its batch edit feature makes it a convenient choice if you’ve too many songs to fix.
This music metadata editor has two panels: The right-hand side panel shows you a list of all songs located in the selected directory. The left-hand side panel shows you the actual tags associated with the selected file(s).
1. Download and install the Free MP3Tag tool on your computer.
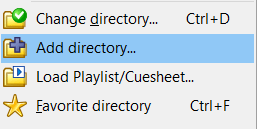
2. Click on the “File” menu.
3. Select “Add directory“.
4. Select a folder that contains your MP3 files.
5. Wait for a while as the tool takes some time to load all music files located in the selected folder.
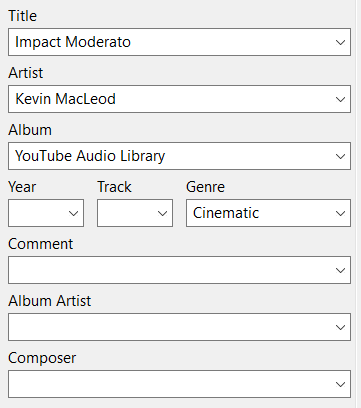
6. You’ll see the files list on the right-hand side panel along with the metadata associated with those files. If any songs lack necessary tags, those fields will appear blank.
7. Select multiple files of your choice. To do so, select the first file in a row. Press and hold the “Shift” key of your keyboard. Now, click on the last file in sequence while releasing the “Shift” key to end your selection.
8. Once you’ve selected your files, quickly fill up the metadata you want to add.
9. Save your changes.
Method 2: Manually Change Metadata on MP3 Files with Microsoft Groove Music
If you don’t wish to use a third-party mp3 tag editor software, you can use Microsoft Groove Music to manually edit mp3 tags.
This in-house music player in Windows 10 & 11 lets you change the song & album title, song & album artist, track, genre, disc, and year. If you have hundreds of songs to fix, its mp3 metadata editor may appear inconvenient, as manually updating each file’s metadata can be both time-consuming & labor-intensive.
Step 1: Build Your Music Library
First things first, build a music library by selecting your local music folders. It may take some time.
1. Open Groove Music.
2. Click on the Menu icon (four horizontal lines) on the upper left side.
3. Select “My Music“.

4. Click on the “Songs” tab.
5. Click on the “Show us where to look for music” link-label.
6. Click the Add icon (a Plus symbol), and choose a folder that contains your music files.
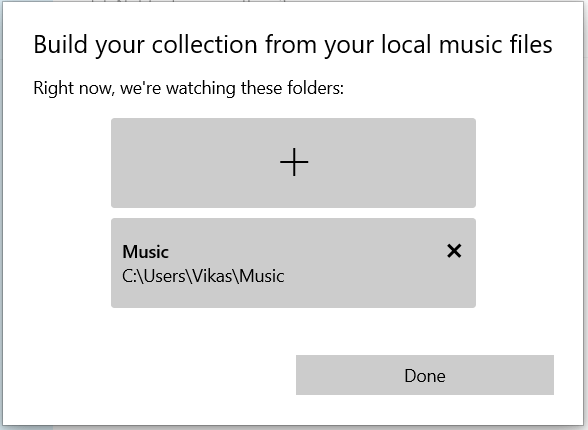
7. Click on “Add this folder to Music“.
8. To add multiple folders, repeat the same process.
9. Click on “Done” once you’ve finished.
Step 2: View & Edit MP3 Data
Once all files have been added to the music library, you can now edit mp3 info. Here’s how:
1. Click the “Songs” tab under “My Music“.
2. To change metadata on mp3, right-click a file and select “Edit info“.
3. In the Groove Music tag editor dialog, you can view and edit your song’s metadata.
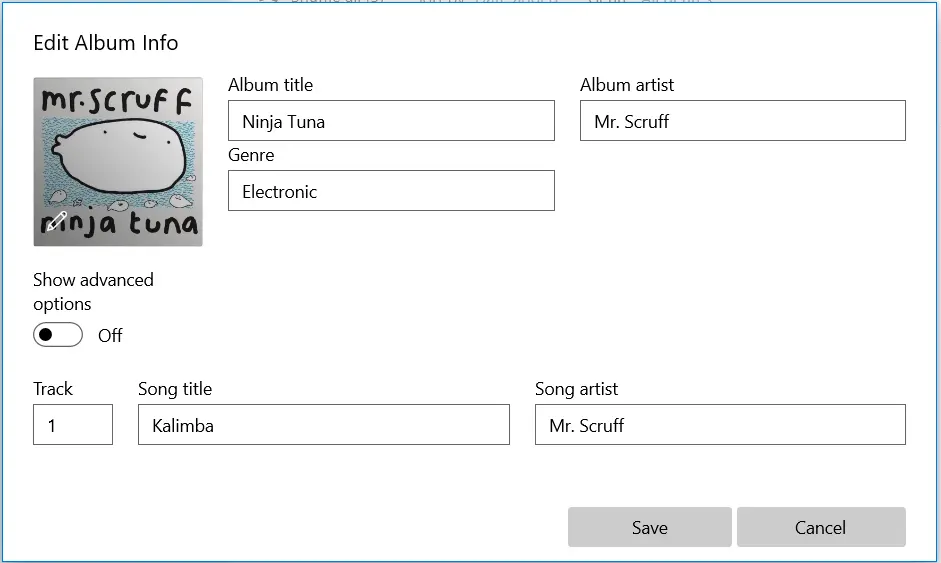
4. Click on Save to apply the changes.
Method 3: Manually Edit Audio Metadata with the File Properties Dialog
Windows lets you edit MP3 file tags manually. If you’ve fewer songs to fix, it can be a good option.
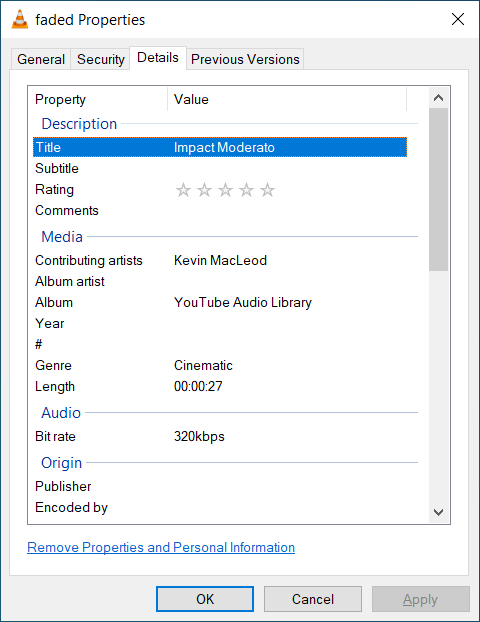
- Right-click on a music file, select “Properties“.
- Click on the “Details” tab.
- View and edit your file tags.
- Click on “OK“.
Note: To completely remove metadata associated with a file, use the “Remove properties and personal information” link at the bottom of the Details tab.
Organizing Your Songs with Music Tags
The primary purpose of MP3 tags or metadata is to provide details about the nature and origin of an MP3 file. Besides, it helps you organize your music files in an orderly manner. In a separate blog, we’ve already covered easy and automated steps to change mp3 album cover.
With correct metadata information, it becomes easier to classify your music by artists, release year, and numerous other attributes. You can also conduct a thorough search to find out all the albums belonging to a specific artist.
Windows allows you to organize your music files by their tags. You can sort or group files in a folder in ascending or descending order based on their attributes.
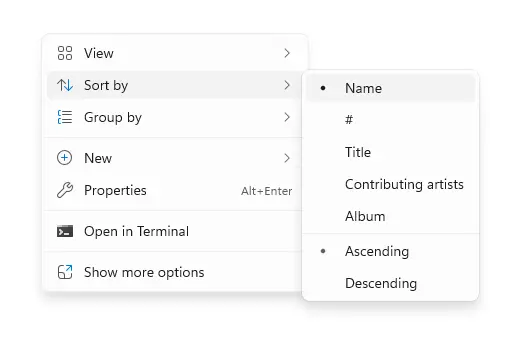
- Launch File Explorer.
- Open your Music folder.
- Right-click on an empty area and select “Sort by” or “Group by“.
- Select Name, Title, Contributing Artists, Album, or any other metadata of your choice to sort or group your files.
Bonus Tip: Find Duplicate MP3 Files by Comparing MP3 File Tags
If you’ve a large music collection, you could have duplicate songs scattered across multiple folders and drives.
The duplicate music finder feature of DupInOut Duplicate Finder lets you compare your MP3 files by music tags and identify duplicate files easily. Here’s how:
- Download DupInOut Duplicate Finder.
- Click on the Add button, and select your Music folder.
- Set the scan mode to Music Search.
- Choose your desired tags for comparison.
- Click on Start Search.
- After the scan concludes, click on Review & Fix, and determine which files to delete, move, rename or replace.
Leave a Reply
You must be logged in to post a comment.